Showing posts with label tutorial. Show all posts

Friday, May 18, 2012

Shoebox Float

I know that I've already mentioned Lily Ruth's shoebox float (and her unwillingness to assist in much of the process), but it was an exciting milestone for me as well, and I want to show you more.

Fiesta is an event that only happens in San Antonio, but it overtakes the entire city for as week. The Battle of Flowers parade is so big that all schools in the city are closed for the day, and most downtown businesses are closed due to traffic and pedestrian congestion. Said parade has also spawned the endless tide of shoebox floats. It is a rite of passage in our community - loved by some, dreaded by others. The process of creating a shoebox float is relatively simple: you cover a shoebox in colored paper and decorate it. That's it. There are no rules. The only guidelines are those set by individual contests - and almost every elementary school has one.

Lily Ruth's Parent's Day Out program has an annual Fiesta parade and party. The 'older' kiddos (3-5) either make a shoebox float or decorate their tricycles/bicycles. The younger kiddos (infant-2) are pushed along the route in strollers and wagons covered in paper flowers and bright ribbons. Then we all head inside and eat entirely too much food - all of it lovingly prepared by the nursery staff.

I jumped at the chance to make a float. I have fond memories of the fun and frustration of covering an entire shoebox in tiny tissue paper 'flowers' in the wee small hours of the morning (it was probably 10 pm :-P) the night before my Brownie troop parade. I was eager to share the fun with my daughter... I tend to overestimate her attention span and her interest in any process...

To be fair, I chose a design where she could help with every step. For the most part, she declined... choosing instead to wander off with each design element as it was completed, and play happily on her own.

I decided to make a garden themed float. As you well know, we're in love with our garden. The most exciting parts for Lily Ruth are using garden tools and growing a bean tee pee. It was a no-brainer to play on those things...


O.k., so, to start, we (yes, she helped with this part) covered the shoebox - and our hands - with school glue, then slapped on some green tissue paper. If your shoebox is a dark color or has a logo, you might need to paint it a solid color first or cover it in heavier paper. Our box was white with tiny green flowers (a giant 'thank you' to Ms. Kyla who gave baby Lily Ruth presents from Janie and Jack) so we got off easy:


Then I made a tiny bean tee pee. I used a cardboard circle for the base and wooden chopsticks (broken in half) for the poles. Hemp twine for the stings around the poles. Green and hot pink copper wire from my bead supplies as the vines. Green foam (formerly a bracelet kit) for the leaves. A dot of hot glue on each to attach them to the vines. I tried to interest Little Miss in helping me attach tiny leaves to the tiny tee pee. She declined. *Aside: I really want Lily Ruth to use the glue gun with me, but she burned her finger the very first time she tried it, and now she refuses to go near it.*:

The tiny watering can (to the right of the float) is made from recycled cardboard pieces - I've been saving all sorts of stuff for just such an occasion. The body and handle are made from  a toilet paper tube. The neck is a dry cleaning hanger tube. I glued a giant button to the end for the spout. Lily Ruth and I finger-painted the can pink. When it dried, we covered it in glue and shook pink glitter all over it...

it's fun to cover your hands in glitter, too!

The front piece is printer paper with stickers from our stash. The letter stickers are old and lost their stick, so they had to be individually glued :-/ At least glue-ing is something that she wanted to do!

I made squirmy worm-ies out of pipe cleaners and googly eyes. Those were immensely popular. It took a good half hour of play before she was ready to hand them over.

From there, it was just glue-ing the elements in place. Lily Ruth chose Belle, Hiccup and Ken to ride on the float. Once everybody was secured with hot glue, I cut small squares of tissue paper. Each square got wrapped around the eraser end of a pencil. Add a dab of glue, press into place and hey, presto: PINK flowers!


We lucked out: the box sat perfectly over Lily Ruth's Little People carriage - that means she had wheels for her float! You can just drag le box across the ground, but it gets beat up pretty fast. Wheels (of the pre-made variety) are the way to go.

There you have it! How To Make A Shoebox Float by Lily Ruth and her Mama :-)


Wednesday, March 28, 2012

Beaded Outdoor Mobile

Yep, totally have crafting fever again. I wandered into JoAnn today, and wandered out with the supplies to make THIS:

A beaded mobile for Lily Ruth's Hideaway!!! I used a package of plastic beads, a spool of 20 gauge hot pink copper wire, a pair of pliers, some hemp string and a pre-cut wooden spiral shape.

This is not truly a tutorial, because it's too easy for that. Rather, I shall lightly brag about how I spent my afternoon in a semi-explanatory fashion...

First, I added wire to each bead:

That took the most time. I tried to keep the shapes fairly free-form, but made sure that both ends of every bead had a loop for connecting.

Then I used a small nail to punch 5 holes in my spiral - 4 evenly spaced around the edges and one in the middle. I put a short piece of wire through each hole, and made loops on each side. The loop on the top holds the string, the loop on the underside connects to the beads:

After that, I just had to force my brain to allow for some randomness. I just stood underneath the spiral and made chains:


I love it so much that it may have to live indoors. Wait, maybe I should just make more chains and hang them in the doorways like bead curtains! :-P

Happy Wednesday, friends! Gotta dash.

Tuesday, February 28, 2012

Felt, Felt, Felt, Pinterest.

O.k., when I decided to call myself a storyteller and try to write more stuff down, I caused an internal panic and shut-down. Typical. The same thing happened when I tried to journal one summer... and it happens every time that I try to diet... *harumpfh* Oh well. I have made a deal with myself that I must write for at least an hour while Lily Ruth is at Parent's Day Out. After all, someone has offered to possibly pay me, therefore it is my job to do it, right?

Good things have continued to happen since I last blogged, I just haven't had the time to tell you about them because (wait for it) I Discovered Pinterest (dun, dun, duuunnnnnn). *sigh* I've heard friends and other bloggers talk about it for a while. I intentionally avoided it because they ALL said that it was a huge, addictive time-suck. They were ALL right. You log in (just for a quick second) to see if anybody has cute ideas for Valentine's Day and the  next thing you know is that it's dinner time and all you have to show for your day are 23 'likes', 16 're-pins' and a bad case of eye-strain. By the way, in case you didn't know, Pinterest is basically an on-line bulletin board system. You create boards then 'pin' images or videos to the board. Much handier than bookmarking everything then scrolling through countless bookmark folders (Also, the pictures are so pretty!). My new Pinterest resolution is that I can only pin things that I find on my own - I am not allowed to troll existing boards except in emergency situations.

Speaking of Valentine's Day (nice segue, right?), did I show you the coffee cup sleeves that Lily Ruth and I made? Well, here they are!

Aren't they lovely!? They're so easy to make that it's a bit silly... The pink felt with hearts and buttons was our first batch. We made two of them:

I absolutely adore the finished product, but let's face facts here, people - felt is flimsy. These single-layered sleeves felt pretty much disposable. Our next batch were double-layered and feel sturdier. We made 3: one for Miss June, one for Mr Anthony and one for Nanny (Lily Ruth chose the recipients!). She also made 'shapes' for her friends Lola & Jett :-P

In case you want to make some sleeves of your own, here's a quick almost-tutorial:


Coffee Cup Sleeve
(or Coffee Cup Cozy, if you prefer :-P)

Materials:
pattern
felt ( I used wool blend and not crafting squares)
fabric marker
decorations (felt stickers, buttons, fabric paint, appliques, anything that tickles you)
hot glue gun
thread and embroidery floss in matching or contrasting colors

Method:
My jumping-off point involved two tutorials. This one form The Purl Bee:


And this one from The Cottage Home:


I downloaded a pattern from The Purl Bee (available here) and added 1/2 an inch to the end so that it was the same length (but a slightly different shape) as a Starbucks sleeve:

(I also drew instructions on it in case I wanted to add the elastic/button from The Cottage Home's method).

Trace your pattern onto the felt & cut it out. Adorn your felt. We used felt heart stickers and buttons on the first batch and stickers and fabric paint for our second batch. If you use stickers, glue them in place with the hot glue gun or they will lift. If you use paint, allow it to dry overnight. I would not suggest adorning both sides in hope of creating a double-sided masterpiece - it'll make the sleeve too bulky.

If you are going to use a double layer of felt (which I would suggest), sew a quick line all the way around the edges to bind your two pieces.

Glue the ends together - I found that just barely under an inch of overlap is the perfect amount (you can see it in the first picture). Now add a line of stitching with the embroidery floss (I prefer a contrasting color) to ensure that it stays put:

Hey presto - you're DONE! Now you just need coffee:

And someone to share your coffee experience with. Preferably someone who will look at the camera. If that someone is not available, you may have to settle for this girl:

But you never know - you might get lucky and end up with THIS girl!:

I have more stuff to tell you, but right now it's time to play with my daughter, so you'll just have to be patient. Happy coffee and happy crafting, ya'll!

Thursday, January 12, 2012

Doll Shoes: A Tutorial

Let's say that your daughter only had one Barbie-sized doll. Let's also throw in there that said doll had not worn her shoes (because they don't stay on!!!!!!) since she made it in the front door.

Now let's say that since Christmas has come and gone, your daughter now has TEN Barbie-sized dolls. Let's add that FIVE of them have those freaking shoes - and your daughter now wants all of them to wear their shoes.

*sigh* NOW, let's get real and say that this is me. I now have a life full of Disney Princesses:


and Fashionista Barbies:

Well, thank goodness for Fashionista Barbie. Her glitter platform heels are held on with clear rubber bands! In a pattern that is easily duplicated and holds all doll shoes on!!!!

1 - with the shoe on, loop a small elastic band (a.k.a. pony tail holders) around the doll's ankle:
 2- twist the band once and pull it down over the shoe so that the 'x' rests on the top of her foot:

 3 - now that you're under the shoe, twist the band again:

 4 - leaving that 'x' under the shoe, draw the band back up to the top of her foot:

5 - release the elastic - you're done!

Now all of your dolls have shoes that stay on! Well, sort-of. Mama will have to make touch-ups every so often... P.S. Now is a good time to invest $2.50 in a package of hair elastics that match all of your doll shoes ;-)

Then release the dolls back into the wild and go about your business:

Star Ornament Tutorial

O.k., so you guys already know that I love to figure out how to do stuff, right? Well, I do. That's one of the main reasons that I can't just follow someone else's tutorial or pattern (or recipe) without making adjustments or additions of my own. One I have the basics down (or at least think that I do), I am almost always compelled to see what else I can do with it.

That's how this ornament came about. I made the felt tree topper star, and learned how to 1) make permanent creases in felt by whip-stitching and 2) make a three-dimensional star. I LOVE my tree star, but I prefer that my stars have an odd number of points. Typing that out makes it sound weird and compulsive... maybe it is... at any rate... I wanted to see if I could make a 3-D five-pointed star. I can. And now you can, too.

Now, keep in mind that I am a complete amateur and I have zero patience, so my stitches are almost never even, and at least one area will require that you look at it with soft, unfocused eyes. That said, let's start crafting!

Rachel's Felt Star Ornament

materials:


felt (wool or craft - this project is small enough that you can get away with craft squares)
thread that matches the felt
embroidery floss (choose a color that compliments the felt - preferably a metallic ;-) )
star templates
needle that can accommodate 2 strands of embroidery floss at a time

method:

I used white craft felt with silver glitter in it. This means that I used white thread and silver embroidery floss. I now have plans to make future stars using combos such as aqua felt with copper floss or hot pink with glossy black... you get the picture.

I traced and scanned stars for you - you're welcome ;-) Wait, I have no idea how to add PDF files to my blog. dammit. Fine, I'll turn them into jpeg files and get back to you... crap... :-O Ya'll, I am freaking.out. I put both stars on the scanner and hit 'scan'. My super-smart printer turned them into 2 separate image files. Awesome!


SO, the star with the dotted lines is your front piece, and the plain star with the skinny arms is your back piece. Cut out one of each.

The lines on the front piece are lines that you will sew down using a tiny whip stitch

First, mark the center of your star - front and back. I would NOT suggest using a Sharpie or a pencil - I used a pencil on my first try, and ended up with a mark that I had to cover later. I would suggest using a tiny stitch in the same color as the star.

Flip your star over so that the back side is up. If you are not using felt that has glitter on the front, pick a side, and call it the back.

Following the tiny dotted lines, and using the thread that matches your felt, whip a very shallow seam from the interior corners to the center of the star. It helps to match up the adjacent points - this creates a straight line from corner to center:

Once you have done that to all 5 corner-to-center lines:


flip the star over so that the 'front' is facing up. Following the dashed lines, and using the embroidery floss (I used 2 strands at a time), whip stitch a slightly deeper seam from the tip of each point to the center. Once you have found your seam line, pin it thus-ly - this keeps the felt from shifting as you stitch:

If you made a super-ugly mark in your center and need to cover it up, attach a bead that is too big and looks weird:

Then go back and remove the bead, for it is ugly. Replace it with random embroidery stitches:

Alright, here's the part where you just wing it... or at least that's what you do if you're me. Starting with a corner (not a point), line up your front and back pieces. Using the embroidery floss, whip stitch the two pieces together:

Notice that this is where my 'skills' let me down. For some reason, I can manage a fairly even-looking stitch down the points, but when it comes time to join the pieces, it all goes whonky. This is a case of 'do as I say, not as I do.'  Especially when it comes to the pointy bits. My original template for the back piece was slightly shorter than the front piece. This meant that I had to fudge the ends of each point. They look ridiculous. I even tried to only photograph the edges without including the points. My camera isn't good enough for close-ups that small :-/

Luckily for you, the scanner made the stars the same size. Yay for technology! Anyway, there it is. whonky points and all. My Star Tutorial :-) You'll get a picture of the finished product if and when I finish one and remember to photograph it before I give it away.

Friday, July 9, 2010

Felt Purse Tutorial

Here it is! The adorable felt purse tutorial. You may or may not recall that I made the first one for our airplane trip. I loved it so much that I made a second (tiny) one. The second one was a lot harder because I was not deliriously throwing an ill advised craft together at the very last (panic filled, sleep deprived) second.

I actually took my time and tried really hard to care about things like straight seams and even edges. Whatever. It's felt. Felt is very forgiving. If you screw up, you can either snip off bits until it's fixed or throw it out and start over because crafting felt is so dang cheap.

I decided to create the tutorial because 1) I'm thrilled that I made this up out of my own (panic filled, sleep deprived) head and 2) I'm excited that it was so easy.

So here's what you need:

- felt pieces (29¢ at JoAnn) - get lots of pieces in lots of colors because it's hard to stop making felt things once you start
- disappearing fabric pens
- maybe ribbon for trim and/or something cute to sew on the front (applique or flower or buttons...)
- embroidery thread in a complementary color (get lots)
- I am in love with my rotary cutters and cutting mat. it saves a lot of time measuring and marking b/c you can just follow the lines on the mat...

Decide what size you want to make your bag. In theory, the front and back pieces could be as large as an entire rectangle of felt. For my first bag, I was using a color that I loved, but had a limited amount of, so that determined my bag size. For the second bag, I wanted it to be tiny and adorable, so I made each panel 1/4 of a felt rectangle.

Pick colors. I used different colors for the front and back panels on the first bag, used three colors for the sides/strap (supply issues), and lined it in white. I used matching panels for the second bag, used two colors for the sides/strap, and lined it in white. I like the fact that they look really homemade and whonky, and I feel like the white lining adds to that. By the way, you DO need to line the bag, or it will be too flimsy, and will probably not survive it's first week of use.

Whatever size you decide on for your bag, cut 4 pieces that size - 2 in the colors of your front and back panels, and 2 in the color of your lining.


Using the fabric pens, mark off a curve on one corner - this will be the bottom of the bag. Then fold that piece in half and use the line as your guide to trim both corners (so that they will match) like so:


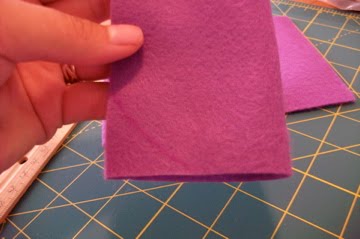
Here's where the cutting tool and mat come in for the first time - if you have them, you can stack the felt and cut it flat. If not, use your original piece as a guide for trimming the other pieces one at a time:


If you are using ribbon as trim across the top or decoration on either or both panels, affix them now. I hand stitched the bird to the purple piece only then sewed one straight line through the ribbon, purple and white pieces:


Now you need to decide how deep you want the bag to be - this will also be the width of your strap. You will need pieces that are as wide as you want the bag to be deep. You will need enough of these pieces to go around 3 sides of your panel and still be long enough for the strap... see photos of finished bags for clarification...

For the tiny bag, I chose to make the sides/strap 1/4 of the width of a felt rectangle... so I cut a piece of felt into 4 equal strips down it's length.

Through the highly scientific process of 'eyeballing it', I decided that the length of 4 strips was perfect to go around my panels and still have a nice strap. SO, cut your strips for the outside, and cut strips of matching length and width for the lining.

Sew the strips into a loop with all of the seams facing the same direction:


See how I am cleverly showing you in a manner that is much more clear than all of the explaining I just did! Do the same sewing for the lining pieces.

*Note: the strips do NOT have to be the same length, just the same width! You could have 2 pieces, 4 pieces, 9 pieces, etc. as long as they all the same width and they equal the length that you have determined is perfect.

Iron the seams open on for both loops - TRUE STORY: if you turn the iron up too high, you will melt felt onto your iron, and then you will have to get even MORE creative as you attempt to remove the stuck-on felt bits before your husband accidentally irons red and purple felt onto one of his dress shirts... I'm just saying...

Slide the lining loop into the outer loop with the seams for both loops facing inward. I also offset the seams so that I would not have to sew through a bazillion layers at once:


Here's the only 'tricky' part. I pinned the middle of the bottom of the front panel to what I arbitrarily decided was the middle of the sides/strap piece. You will be pinning through 4 layers of felt:


This is the only part that I pin. The rest can be aligned as you sew. In fact, it is better not to pin for the rest of this project as 4 layers of felt means that you need to give it room to shift as you go along.

Starting in the middle (where you began pinning), sew the edges together. I used a 1/4 inch seam so that I could use the edge of my presser foot as my guide. You will need to go very slowly as you take the corner. Hold the layers together very tightly - moving your grip as you keep the edges together:


I sewed from the middle to the top of the panel (where the ribbon is), then from the middle again all the way around the other side then over the strap - finishing at the ribbon. You could choose NOT to sew around the strap at this time as we will be finishing all of the raw edges with a blanket stitch, but my blanket stitch is not that great, and I needed the machine line as a visual guide to keep it looking nice.

*Note: I used a contrasting color for my thread for the entire project (aqua). I did this for three reasons 1) I am lazy, and did not want to refill my bobbin, 2) the blanket stitch that I used to finish the bag hides most of the machine stitch, so it doesn't really matter and 3) I really like the amateur/homemade look of the whole thing.

Pin the back panel on, and repeat the sewing on that side:


Ya'll the bag is done! All that's left is a finishing embroidery stitch around the edges! Told you it was easy ;-)

So, you can find an awesome blanket stitch tutorial HERE (thanks AGAIN to Samster Mommy who showed it to me). I used this stitch aaaaaall the way around the larger purse and around the little purse except for the edge that has ribbon. Here is a close up of my blanket stitching:


Notice how I used my machine stitched line as my guide? :-)

Here are the finished bags:


with their straps twisted to show their colors:


and from the back - just because:


and of course - one with Lily Ruth :-) as she attempts to rid herself of the purse...


Ta-da!