I almost forgot to post Halloween pictures! Sheesh!
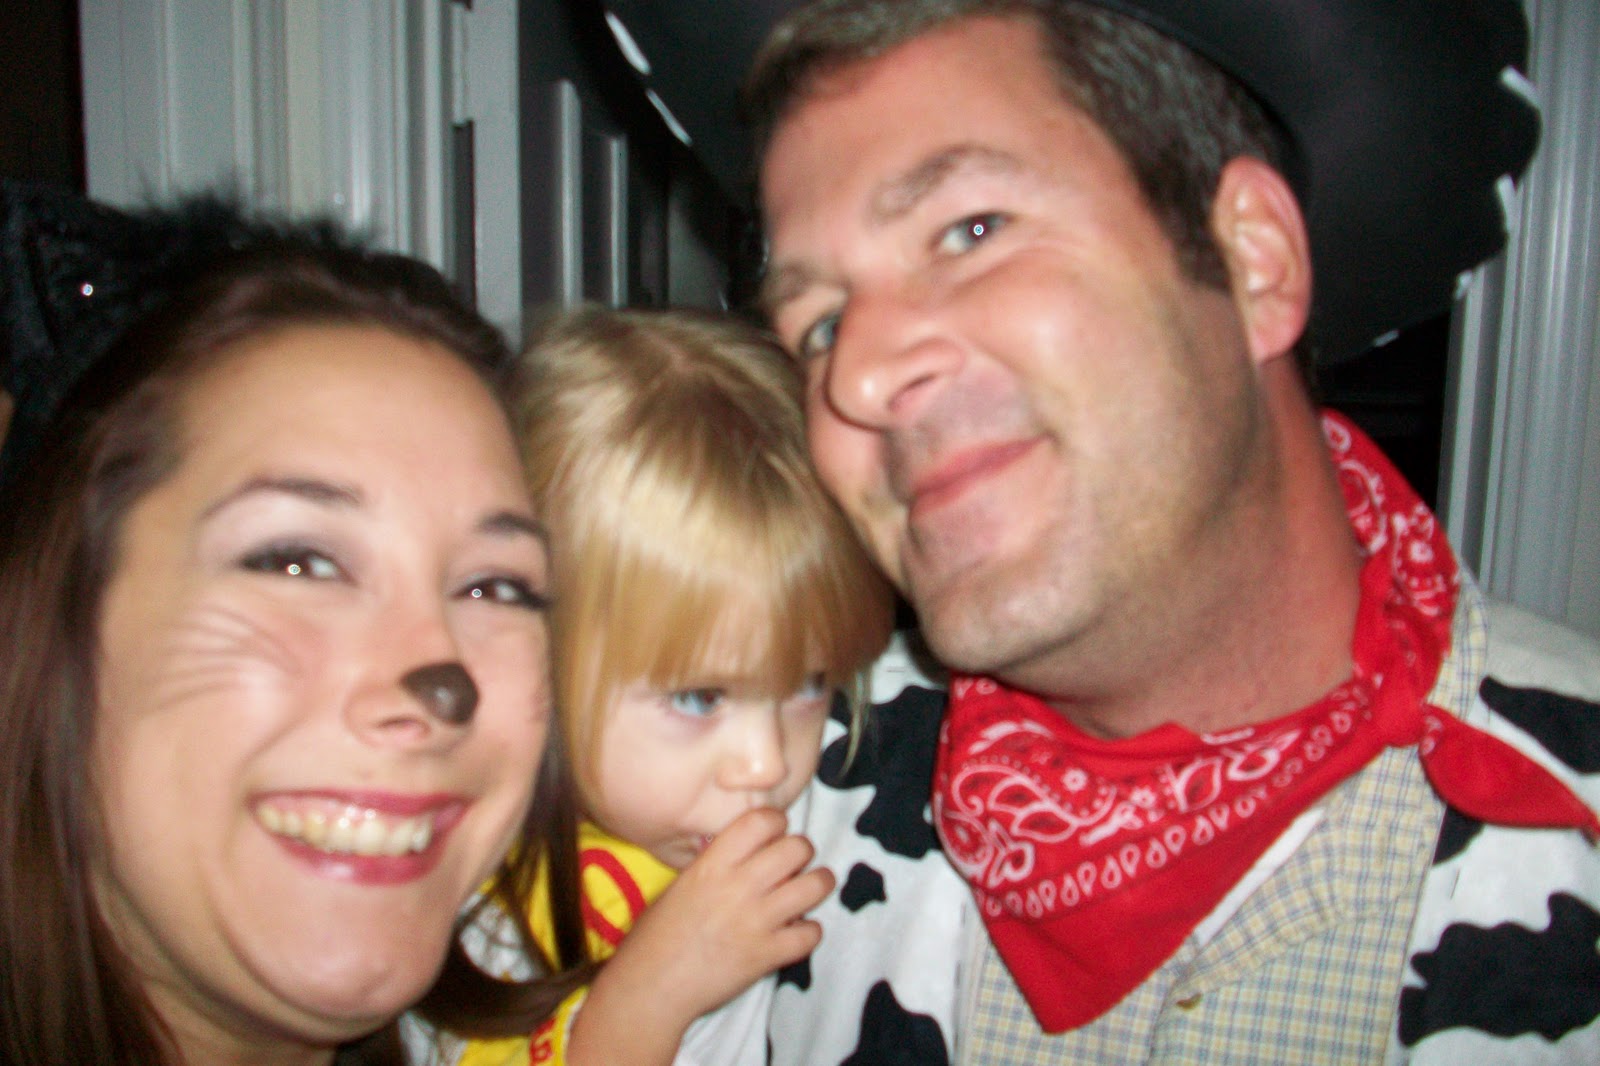
You've already seen Lily Ruth as Cowgirl Jesse. When she chose her costume, she announced that Daddy was going to be Woody, and Mama was going to be Buzz Lightyear :-/ Not that I would mind being Buzz Lightyear, but it would have been a bit labor-intensive. After constructing Lily Ruth's costume and hand-stitching cow print to an existing vest for Sheriff Woody, I was drained. Daddy came to my rescue and bought a pair of cat ears for me while he was out searching for the perfect hat. Then all I had to do is run up a quick tail from black felt, and shove myself into some slim black clothes - voila, cat!
- as an aside, Lily Ruth was almost Cat Jesse. When I drew on my black eyeliner cat nose and whiskers, she delightedly demanded a set of her own. I gleefully complied. There was a moment of almost catastrophe when Daddy tried to wipe it off without her permission (Boys! What was he THINKING!?), but in the end, she asked to have it removed before we left because the nose was distracting.
So, here you go! First up, a party on the Saturday before Halloween. Jesse was pretty much attached to the leg of Sheriff Woody - it was a noisy party, and she was NOT convinced that she wanted to be there:
So Daddy picked her up and gave her a cuddle:
and I squeezed in for a quick pic:
Amazingly, those are the only pictures of us from the party...
Here are the only pictures of us from Halloween night -
Slightly fuzzy:
Even fuzzier:
... I need to either be a bit more forceful about getting the camera out and taking pictures / asking others to take pictures of us OR I need to stop feeling disappointed when I end up with 5 mediocre pictures. *sigh*
Pictures aside, we had a WONDERFUL time dressing up as a family. It was even more fun to do it twice :-) Lily Ruth was positively giddy. She referred to Don as 'Woody' constantly - we're talking every sentence she uttered to him - and giggled every time that she called me 'Cat'. She also yodeled on command 'Yodel-ay-he-WHO'. It was hilarious.
---------------------------
On to the food!!!!
I made burgers based loosely on a recipe from Deceptively Delicious :-) They were possibly the best burgers I've ever made. Wait, you know what, they WERE the best burgers I've ever made. Yum.
Rachel's Veggie Loaded Burgers
1 Lb ground meat (I used sirloin, but you could use any beef or even turkey)
1/4 cup pureed steamed carrot
1 Tbsp Worcestershire sauce
1/4 Lb baby bella mushrooms cleaned and finely chopped
1 zucchini finely chopped
garlic powder, salt & pepper to taste
1) Mix all that stuff together then shape it into patties. 2) Cook those suckers. 3) Top with cheese - I used Havarti. 4) Whimper softly as you take the first bite because it's THAT GOOD.
I have no idea what sent those from possibly good into amazing, but they were... Lily Ruth was not as thrilled as I was. Next time I'll chop the mushrooms and zucchini into much smaller pieces so that she can't see them ;-)
You're welcome. :-P
The ups and downs, ins and outs of an older first time mom who is staying at home... mostly I parent, tell stories, cook and craft (in a very limited manner)... if you like that stuff, you just might enjoy my blog!
Showing posts with label Halloween. Show all posts
Wednesday, November 9, 2011
Wednesday, October 26, 2011
Cowgirl Reveal!
Ya'll, I DID IT! I made a costume! Of course, I had to wait until Lily Ruth was at Parent's Day Out so that I could finish it, so she's not here to model it yet... but I'm too excited to wait!
Here's how it went down:
I made patterns for the yoke and cuffs by tracing the outlines of the onesie directly onto parchment baking paper. Then I added 1/4" seam allowances all of the way around. For the cuffs, I also angled the edges so that they'll stand away from the sleeves.
I spent a while getting the design placed the way that I wanted it. It's a good thing that parchment paper and pencils (and erasers) are so compatible...
I 'bulked up' the yellow fabric for the yoke with heat-n-bond fusible interfacing, then I used a low iron to flatten my pattern onto the fabric. Now it was time to pin then cut out my yoke:
- I have no idea what happened there or why I thought it would work. I ended up with 4 small pieces of completely unusable fabric :-/
I cut 2 yellow cuffs:
Then I decided to bulk up the cuffs with yellow crafting felt, so I cut some of that too:
Once I ironed down and stitched all of my edges, I added red puffy fabric paint to the edges:
Now it was time to add the detail to the yoke. I was stumped as to how I could match my painstakingly carefully drawn pattern... until I was struck by genius - I poked the entire line with a sewing pin, placed the pattern back onto the yoke, and followed my now-dotted line with a red marker (red in case any of it showed through the trim...):
It was a huge pain in the ass to hand-guide the trim along the line under my sewing machine foot, but it was totally worth it. I didn't have to hand-stitch the entire thing, AND it is securely attached.
Next, I used embroidery thread to tack cow print 'chaps' to her jeans:
For her belt, I used scrapbook specialty paper. I actually SEWED paper, ya'll. I cut 2 strips of suede-feel paper that were just under 2" wide (her belt loops are right at 1"). I connected the strips, used a low iron to turn both edges in, then sewed them down with red thread. I cut a cardboard oval, sewed 2 loops to the back and used a hot glue gun to cover it with gold paper - voila! belt:
Then is was just the tedious business of taking the yoke and cuffs to the onesie. I decided to go with snaps on the shoulders (I now hate snaps) and quick stitches at the bottom (corner points only) because I want to be able to detach this stuff after Halloween and use the onesie for the rest of winter. The cuffs are stitched with embroidery thread, and will come of easily... Oh, and I added white lacing to the awesome cowboy hat that our friends found for us... *need a minute to catch my breath* *WHEW!*
Enough talk - here it is!!!
Don't look too closely - it is far from perfect. Fabric paint is HARD, ya'll... but I love the way that it turned out :-) and my little cowgirl is pretty excited too...
I picked her up early from Parent's Day Out, and plopped her on the kitchen table to check it out. 'Is foe ME?!':
And approximately .05 seconds later 'I a COWGIRL! Ee-HAW!!!!':
Here's how it went down:
I made patterns for the yoke and cuffs by tracing the outlines of the onesie directly onto parchment baking paper. Then I added 1/4" seam allowances all of the way around. For the cuffs, I also angled the edges so that they'll stand away from the sleeves.
I spent a while getting the design placed the way that I wanted it. It's a good thing that parchment paper and pencils (and erasers) are so compatible...
I 'bulked up' the yellow fabric for the yoke with heat-n-bond fusible interfacing, then I used a low iron to flatten my pattern onto the fabric. Now it was time to pin then cut out my yoke:
Then I cut notches into the seam allowance so that my edge would lie flat:
After a failed concept,
- I have no idea what happened there or why I thought it would work. I ended up with 4 small pieces of completely unusable fabric :-/
I cut 2 yellow cuffs:
Then I decided to bulk up the cuffs with yellow crafting felt, so I cut some of that too:
Once I ironed down and stitched all of my edges, I added red puffy fabric paint to the edges:
Now it was time to add the detail to the yoke. I was stumped as to how I could match my painstakingly carefully drawn pattern... until I was struck by genius - I poked the entire line with a sewing pin, placed the pattern back onto the yoke, and followed my now-dotted line with a red marker (red in case any of it showed through the trim...):
It was a huge pain in the ass to hand-guide the trim along the line under my sewing machine foot, but it was totally worth it. I didn't have to hand-stitch the entire thing, AND it is securely attached.
Next, I used embroidery thread to tack cow print 'chaps' to her jeans:
For her belt, I used scrapbook specialty paper. I actually SEWED paper, ya'll. I cut 2 strips of suede-feel paper that were just under 2" wide (her belt loops are right at 1"). I connected the strips, used a low iron to turn both edges in, then sewed them down with red thread. I cut a cardboard oval, sewed 2 loops to the back and used a hot glue gun to cover it with gold paper - voila! belt:
Then is was just the tedious business of taking the yoke and cuffs to the onesie. I decided to go with snaps on the shoulders (I now hate snaps) and quick stitches at the bottom (corner points only) because I want to be able to detach this stuff after Halloween and use the onesie for the rest of winter. The cuffs are stitched with embroidery thread, and will come of easily... Oh, and I added white lacing to the awesome cowboy hat that our friends found for us... *need a minute to catch my breath* *WHEW!*
Enough talk - here it is!!!
Don't look too closely - it is far from perfect. Fabric paint is HARD, ya'll... but I love the way that it turned out :-) and my little cowgirl is pretty excited too...
I picked her up early from Parent's Day Out, and plopped her on the kitchen table to check it out. 'Is foe ME?!':
And approximately .05 seconds later 'I a COWGIRL! Ee-HAW!!!!':
Wednesday, October 19, 2011
Almost a Cowgirl
Ya'll, I have everything that I need to start le costume!
The shirt yoke will be yellow cotton. I bought clear snaps so that the shoulders can be straight across instead of following the shoulder line of the onesie. My plan is to cut a paper pattern for the yoke by tracing straight off the onesie (here is my rough draft).
I'll add a small seam allowance then cut it out of yellow. Add a hem all the way around for nice edges, then red trim for the decoration across the front. Red fabric paint for the scallop along the bottom. I'll actually attach the yoke on the sides and bottom, but the shoulders will have the snaps.
The cuffs will be the same yellow fabric with the design in red paint. The collar will be white felt. I have no idea how I'm going to attach it. Perhaps my mom will have a genius idea... she usually does.
The cow print is for the chaps - those will be tacked onto her jeans with a loose, long stitch that I can easily remove after Halloween. The brown and gold in the bottom right corner are actually specialty scrapbook paper. The brown is suede texture and the gold is a dusky metallic. Those will become her belt.
Crud. I still don't have the white lacing for her hat. They only had HUGE spools of it at JoAnn, so I decided to try Michael's... and I forgot to stop there on the way home :-( My blood sugar must be low.
I'M SO EXCITED! I can't wait to really get started! Can you come over and help me?
Tuesday, October 18, 2011
What Are YOU Going to Be?
Lily Ruth has made her decision, and it's final. She wants to be Jessie - the cowgirl from Toy Story 3.
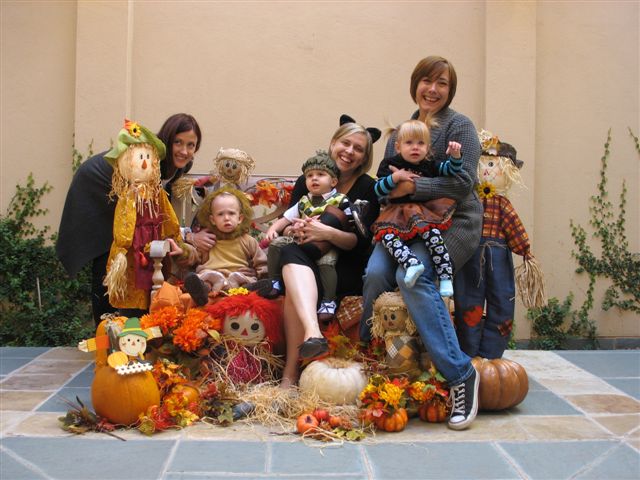
We spent some time talking about what a costume is and looking at pictures from last year when she was my little (crying) imp... (notice how miserable all 3 kids are :-P the moms had to step in and hold them just to get one picture!)
Once I felt like she had the concept of what a costume is, I sat her on the floor with a costume catalog to do some serious research. She was intrigued by the fuzzy infant outfits, but as soon as she saw Jessie, she was hooked. Even after perusing the rest of the pages, she remained firm in her decision. She does not want to be an dog or a cat or a dinosaur. She does not want to be a fairy or a princess or a ballerina. She wants to be Jesse. Period.
I looked around a little bit on line, but it seems that all of the Jesse costumes start at size 3T. Well, Lily Ruth is not a 3T yet... soooooooooo... I'm going to make her costume. If I catch even the smallest break, it should be pretty easy. I bought the yellow for her yoke and cuffs, big pearly buttons and the red braid for trim. A friend found the hat - it just needs white accents:
(She loves the hat. It may not make it until Halloween.) So, really all I need is a white shirt and some felt to make 'chaps' with! Easy peasy, right? We'll see.
*sigh* Now I just need to figure out what I can be with the least amount of effort and cash. I'll keep you posted.
Oh - I almost forgot to tell you! Remember the awesome flower throw pillow? Well, I still need to take the plunge and finish the red one, but I also have the stuff to make another one! Should it be turquoise or hot pink?
Oh, AND my twenty year high school reunion is this weekend. If anything outrageous happens... well, I won't post it here ;-)
We spent some time talking about what a costume is and looking at pictures from last year when she was my little (crying) imp... (notice how miserable all 3 kids are :-P the moms had to step in and hold them just to get one picture!)
Once I felt like she had the concept of what a costume is, I sat her on the floor with a costume catalog to do some serious research. She was intrigued by the fuzzy infant outfits, but as soon as she saw Jessie, she was hooked. Even after perusing the rest of the pages, she remained firm in her decision. She does not want to be an dog or a cat or a dinosaur. She does not want to be a fairy or a princess or a ballerina. She wants to be Jesse. Period.
I looked around a little bit on line, but it seems that all of the Jesse costumes start at size 3T. Well, Lily Ruth is not a 3T yet... soooooooooo... I'm going to make her costume. If I catch even the smallest break, it should be pretty easy. I bought the yellow for her yoke and cuffs, big pearly buttons and the red braid for trim. A friend found the hat - it just needs white accents:
(She loves the hat. It may not make it until Halloween.) So, really all I need is a white shirt and some felt to make 'chaps' with! Easy peasy, right? We'll see.
*sigh* Now I just need to figure out what I can be with the least amount of effort and cash. I'll keep you posted.
Oh - I almost forgot to tell you! Remember the awesome flower throw pillow? Well, I still need to take the plunge and finish the red one, but I also have the stuff to make another one! Should it be turquoise or hot pink?
Oh, AND my twenty year high school reunion is this weekend. If anything outrageous happens... well, I won't post it here ;-)
Thursday, November 4, 2010
Happy Halloween!
I really enjoyed our weekend! It started on Friday with Lily Ruth's 'party' at Parent's Day Out. The kiddos wore costumes and parents brought treats and the caregivers made special lunches in the classrooms. Adorable... well, adorable except for what the program director refers to as 'The Annual Torturing of the Children' - also known as picture time:
I only got a few shots before all 3 mamas gave up and got into the picture. Now I just have to remember to ask for copies...
I made a new favorite recipe - Lollipop Cakes! They actually come together very easily, and the recipe multiplies out very easily and tastily. Since I am NOT a great baker, and I needed to make way more of these than the original recipe allows for, both of those things are important. Alright, I'm going to give you the original recipe, then the modified / multiplied version that I have now made twice :-)
The original recipe comes from the 'Bean Appetit' cookbook by Shannon Payette Seip and Kelly Parthen with Carisa Dixon that I acquired on our (AWESOME) trip to Madison Wisconsin. You can see more about them on their Bean Sprouts Cafe website.
Bear with me, This is actually 3 recipes - the Bean Appetit Flour Blend, the Sweet 'Meat' Filling (a.k.a. chocolate cake), and the directions for assembling the Lollipop Cakes.
Bean Appetit Flour Blend
3 cups whole wheat flour
3 cups unbleached all-purpose flour
2 1/4 cups wheat germ
1/2 cup flax meal
combine and store in an airtight container
Sweet 'Meat' Filling
1/4 cup Bean Appetit Flour Blend
1 tsp cocoa powder
2 Tbsp packed light brown sugar
1/4 tsp baking powder
1 Tbsp olive oil
1 tsp balsamic vinegar
2 Tbsp water
2 tsp milk
1 Tbsp chocolate chips
- preheat the oven to 350 degrees
- combine the flour blend, cocoa powder, brown sugar and baking powder in a mixing bowl. Then add the olive oil, balsamic vinegar, water and milk and stir until combined. Fold in the chocolate chips.
- spray a mini muffin pan and pour in the cake batter. Bake for 10 to 12 minutes, until a toothpick inserted in the center of a cake comes out clean.
Lollipop Cakes
Serves 4
1 recipe Sweet 'Meat' Filling
3-4 Tbsp milk
4 lollipop sticks
1/2 cup semisweet chocolate chips, melted
sprinkles
- When your cake is cooled, mash it up into little pieces in a bowl. Add the milk until the cake becomes sticky.
- form 1-inch-diameter balls using the sticky cake. Carefully slide a lollipop stick into each ball. Place in the freezer for 20 minutes or until the cake hardens.
- dip each ball into the melted chocolate and decorate it with the sprinkles. Set the cake balls on parchment paper and let them cool for 10 minutes or until the chocolate hardens.
SOOOOOOOOOOOO, here is the expanded version. Remember, I've made it TWICE, so I'm fairly certain that it's not a fluke that it worked... but it might be... bake at your own risk :-P
Makes 24 - 26 Lollipop Cakes:
1 1/2 cup Bean Appetit Flour Blend
6 tsp cocoa powder (I used Hershey's Special Dark Cocoa Powder)
3/4 cup packed light brown sugar
1 1/2 tsp baking powder
6 Tbsp olive oil
6 tsp balsamic vinegar
3/4 cup water
1/4 cup milk
1/3 (+ a little bit extra) cup chocolate chips (I used 60%+ dark chocolate morsels)
Modifications to the process:
- Mix the cake in the same order as before. use a full size muffin/cupcake tray (I filled a 12 portion tray). bake approx 25 minutes - start checking for done-ness at 20 minutes.
- Once the cake has cooled, mash and mix in milk in small amounts. you want sticky, but still manageable, not sloppy or runny. I used 9 Tbsp milk.
- Roll the cake mixture into balls, insert the lollipop sticks and freeze (40+ minutes worked best for me)
- I may be skewered by real bakers, but I melted the remainder of the bag of chocolate morsels in the microwave (in a pyrex dish) for 1 minute.
- While the chocolate begins it's melting, bring a small pan of water to boil on the stove (small enough that the dish will sit in it w/o becoming submerged). As soon as boiling begins, turn the heat off, and place the dish of chocolate into the pan. The residual heat from the water will keep the chocolate at the right consistency. If the chocolate becomes too hard, turn the heat on 'low' for a minute or two.
- Sprinkle each lollipop as soon as it has been dipped. If you wait too long, said sprinkles will not stick :-(
- By the way, I tried using 'white chocolate' on a few from the first batch - not fantastic...
So there you have it! Yummmmmmmmm. I know - I love you, too.
I only got a few shots before all 3 mamas gave up and got into the picture. Now I just have to remember to ask for copies...
I made a new favorite recipe - Lollipop Cakes! They actually come together very easily, and the recipe multiplies out very easily and tastily. Since I am NOT a great baker, and I needed to make way more of these than the original recipe allows for, both of those things are important. Alright, I'm going to give you the original recipe, then the modified / multiplied version that I have now made twice :-)
The original recipe comes from the 'Bean Appetit' cookbook by Shannon Payette Seip and Kelly Parthen with Carisa Dixon that I acquired on our (AWESOME) trip to Madison Wisconsin. You can see more about them on their Bean Sprouts Cafe website.
Bear with me, This is actually 3 recipes - the Bean Appetit Flour Blend, the Sweet 'Meat' Filling (a.k.a. chocolate cake), and the directions for assembling the Lollipop Cakes.
Bean Appetit Flour Blend
3 cups whole wheat flour
3 cups unbleached all-purpose flour
2 1/4 cups wheat germ
1/2 cup flax meal
combine and store in an airtight container
Sweet 'Meat' Filling
1/4 cup Bean Appetit Flour Blend
1 tsp cocoa powder
2 Tbsp packed light brown sugar
1/4 tsp baking powder
1 Tbsp olive oil
1 tsp balsamic vinegar
2 Tbsp water
2 tsp milk
1 Tbsp chocolate chips
- preheat the oven to 350 degrees
- combine the flour blend, cocoa powder, brown sugar and baking powder in a mixing bowl. Then add the olive oil, balsamic vinegar, water and milk and stir until combined. Fold in the chocolate chips.
- spray a mini muffin pan and pour in the cake batter. Bake for 10 to 12 minutes, until a toothpick inserted in the center of a cake comes out clean.
Lollipop Cakes
Serves 4
1 recipe Sweet 'Meat' Filling
3-4 Tbsp milk
4 lollipop sticks
1/2 cup semisweet chocolate chips, melted
sprinkles
- When your cake is cooled, mash it up into little pieces in a bowl. Add the milk until the cake becomes sticky.
- form 1-inch-diameter balls using the sticky cake. Carefully slide a lollipop stick into each ball. Place in the freezer for 20 minutes or until the cake hardens.
- dip each ball into the melted chocolate and decorate it with the sprinkles. Set the cake balls on parchment paper and let them cool for 10 minutes or until the chocolate hardens.
SOOOOOOOOOOOO, here is the expanded version. Remember, I've made it TWICE, so I'm fairly certain that it's not a fluke that it worked... but it might be... bake at your own risk :-P
Makes 24 - 26 Lollipop Cakes:
1 1/2 cup Bean Appetit Flour Blend
6 tsp cocoa powder (I used Hershey's Special Dark Cocoa Powder)
3/4 cup packed light brown sugar
1 1/2 tsp baking powder
6 Tbsp olive oil
6 tsp balsamic vinegar
3/4 cup water
1/4 cup milk
1/3 (+ a little bit extra) cup chocolate chips (I used 60%+ dark chocolate morsels)
Modifications to the process:
- Mix the cake in the same order as before. use a full size muffin/cupcake tray (I filled a 12 portion tray). bake approx 25 minutes - start checking for done-ness at 20 minutes.
- Once the cake has cooled, mash and mix in milk in small amounts. you want sticky, but still manageable, not sloppy or runny. I used 9 Tbsp milk.
- Roll the cake mixture into balls, insert the lollipop sticks and freeze (40+ minutes worked best for me)
- I may be skewered by real bakers, but I melted the remainder of the bag of chocolate morsels in the microwave (in a pyrex dish) for 1 minute.
- While the chocolate begins it's melting, bring a small pan of water to boil on the stove (small enough that the dish will sit in it w/o becoming submerged). As soon as boiling begins, turn the heat off, and place the dish of chocolate into the pan. The residual heat from the water will keep the chocolate at the right consistency. If the chocolate becomes too hard, turn the heat on 'low' for a minute or two.
- Sprinkle each lollipop as soon as it has been dipped. If you wait too long, said sprinkles will not stick :-(
- By the way, I tried using 'white chocolate' on a few from the first batch - not fantastic...
So there you have it! Yummmmmmmmm. I know - I love you, too.
Saturday, October 23, 2010
Another 'Tidbits' Post
It feels like all of my posts have been in Weekly Wrap-Up format lately. I haven't had any great stories to tell, but there are still things that I want to document. I've also noticed that yet another week has gone by without regular posts. I just haven't had the energy. I feel more like myself today, so maybe things are on an up-swing :-)
In Lily Ruth news, she now says 'baf' for bath and 'ICE, ICE, ICE' in reference to anything frozen. She references frozen foods MANY times each day. She loves all forms of frozen treats. I've taken to freezing her organic baby-sized yogurts so that she'll eat them more often. So far, she's just as excited about that as ice cream or juice popsicles. She is also obsessed with carrying things in containers. She has the felt purses that I made for her and two Halloween buckets with handles. She fills them all up with various items, stacks the containers, and attempts to carry them all (at the same time) to a new location. Then she unloads them all, sorts through the items, reloads them and starts off for greener pastures.
In Halloween news, I've decided against making an elaborate costume. Lily's too young to remember this year, and it's really hard to make a 16-month-old wear something that she doesn't want to. I'll save my energy and effort for next year. I had already made yet another dress up skirt. Here it is - modeled by her giraffe (since she was at Mother's Day Out when I wanted to take pics):
It's 3 layers. Aqua trimmed in orange balls, black trimmed in candy corn ribbon and orange tulle trimmed with black ric-rac. Add the a cute onesie I found on sale at baby gap:
and that's what she's going to wear. Not a costume, but a festive outfit. She'll have darling pigtails (since she refuses to wear hats), and if it's cool enough, coordinating leg warmers (of course). We're debating the purchase of baby-sized Chuck Taylors to finish it off. My only reservation there is the rigid sole. Lily Ruth has only worn soft-soled shoes. Her balance isn't awesome, and her pediatrician agrees that she's better off barefoot or in soft shoes until she's sturdy... I would LOVE to see her tiny feet in shoes that match mine, though :-P
In crummy news, Frank is still missing. I don't think he's going to make it back. My heart is broken. Also, Bing is still not 100% better. This only fuels my suspicion that they got into something poisonous :-(
In family news, we drove to Houston so that Lily Ruth could meet her Great Aunt Sharon and Great Uncle John who were visiting from Hawai'i. Lily Ruth wore her Hawai'ian dress in honor of the occasion:
and did some hot tubbing:
I love that picture. It looks a bit 'art-y', but in reality, Daddy was shooting blind since it was pitch black out there. He would just point the camera in her general direction and hope for the best. I deleted a lot of pictures of my knee and the top of her head. We had a good time with our family. Lily especially approves of Tutu and Pops' new dachshund puppy. Pele is Lily Ruth-sized and completely lovable. They got along like a house afire. Soooooooo cute!
That's enough for now. Maybe later I'll post about my new favorite recipe and Lily Ruth's kicking skills. That kid has some mad skills, yo.
In Lily Ruth news, she now says 'baf' for bath and 'ICE, ICE, ICE' in reference to anything frozen. She references frozen foods MANY times each day. She loves all forms of frozen treats. I've taken to freezing her organic baby-sized yogurts so that she'll eat them more often. So far, she's just as excited about that as ice cream or juice popsicles. She is also obsessed with carrying things in containers. She has the felt purses that I made for her and two Halloween buckets with handles. She fills them all up with various items, stacks the containers, and attempts to carry them all (at the same time) to a new location. Then she unloads them all, sorts through the items, reloads them and starts off for greener pastures.
In Halloween news, I've decided against making an elaborate costume. Lily's too young to remember this year, and it's really hard to make a 16-month-old wear something that she doesn't want to. I'll save my energy and effort for next year. I had already made yet another dress up skirt. Here it is - modeled by her giraffe (since she was at Mother's Day Out when I wanted to take pics):
It's 3 layers. Aqua trimmed in orange balls, black trimmed in candy corn ribbon and orange tulle trimmed with black ric-rac. Add the a cute onesie I found on sale at baby gap:
and that's what she's going to wear. Not a costume, but a festive outfit. She'll have darling pigtails (since she refuses to wear hats), and if it's cool enough, coordinating leg warmers (of course). We're debating the purchase of baby-sized Chuck Taylors to finish it off. My only reservation there is the rigid sole. Lily Ruth has only worn soft-soled shoes. Her balance isn't awesome, and her pediatrician agrees that she's better off barefoot or in soft shoes until she's sturdy... I would LOVE to see her tiny feet in shoes that match mine, though :-P
In crummy news, Frank is still missing. I don't think he's going to make it back. My heart is broken. Also, Bing is still not 100% better. This only fuels my suspicion that they got into something poisonous :-(
In family news, we drove to Houston so that Lily Ruth could meet her Great Aunt Sharon and Great Uncle John who were visiting from Hawai'i. Lily Ruth wore her Hawai'ian dress in honor of the occasion:
She also ate red frosting in honor of Uncle Brad's birthday:
I love that picture. It looks a bit 'art-y', but in reality, Daddy was shooting blind since it was pitch black out there. He would just point the camera in her general direction and hope for the best. I deleted a lot of pictures of my knee and the top of her head. We had a good time with our family. Lily especially approves of Tutu and Pops' new dachshund puppy. Pele is Lily Ruth-sized and completely lovable. They got along like a house afire. Soooooooo cute!
That's enough for now. Maybe later I'll post about my new favorite recipe and Lily Ruth's kicking skills. That kid has some mad skills, yo.
Subscribe to:
Posts (Atom)